The rescued MG Midget with a K-Series upgrade
Fresh from the pages of Practical Classics Magazine, we meet two new car restorers who have changed their classic cars for the better.
As a specialist classic car insurance broker, we love seeing older cars being restored to their former glory, which is why we’ve linked up with Practical Classics to bring you two fantastic stories each month for you to digest and take as inspiration for your own classic rebuilds.
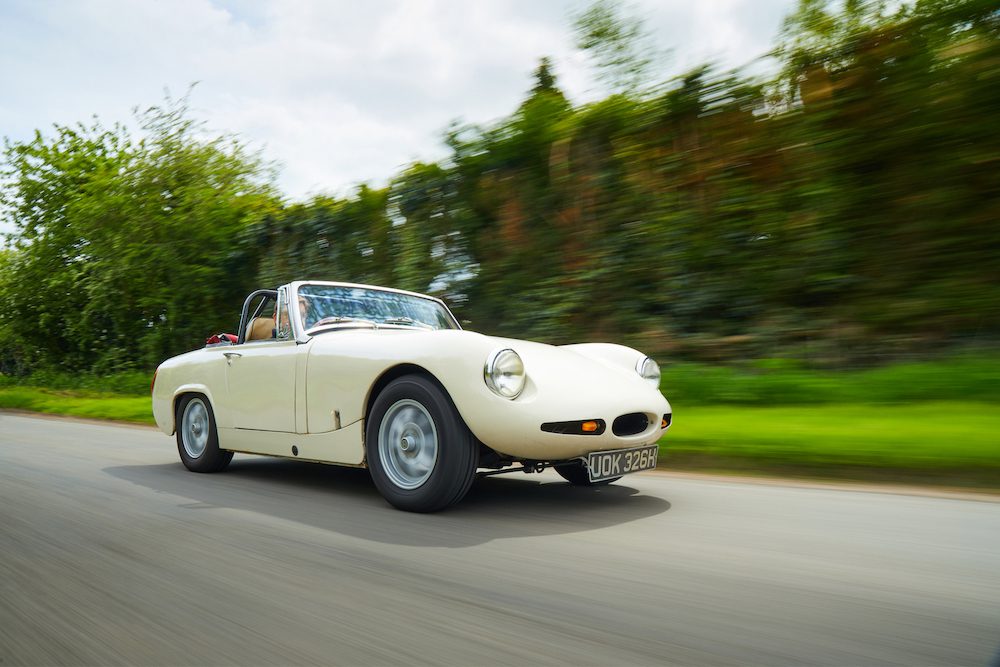
The rescued MG Midget with a K-Series upgrade
Words by Nigel Clark and Pictures by Matt Howell
Tim Dafforn is a long term Triumph enthusiast, currently owning a TR6 and a Stag. However, having enjoyed time spent with a Spitfire in the past, he was keen to discover how its main rival, the MG Midget, compared. The diminutive MG’s reputation for sharp handling and readily available parts helped with his choice, as did the fact it fitted easily into his garage.
In 2005, armed with a generous budget of £200, his search began. Before long, he heard of a Midget restoration project only ten miles from his home. Tim explains: “It was worse than a normal restoration project; the engine was missing, the gearbox had only one functional gear and the suspension was completely shot”. The car was about to be scrapped when Tim snapped it up for the princely sum of £125 and transported it back to his garage.
Tim says “it’s nice to take a car destined for the crusher and put it back into the community”; he also relished the technical challenge and found that after a busy day at work, an hour or two in the garage each evening was quite therapeutic. Just as well, because getting the Midget’s rusty shell back in shape required 1,000 hours of his time on welding alone. The front end was particularly bad and given the high price of steel wings and bonnet, Tim opted for a change in aesthetics with a one-piece Speedwell Monza glass fibre front end. The styling – reminiscent of the Jaguar E-Type – is the work of aeronautical and automotive engineering genius Frank Costin.
The car was mechanically restored in near-standard condition, though the replacement 1275cc A-Series engine was fed by a single SU HIF44 carb from a Metro. Back on the road after a project spanning four years, Tim’s first ever trip behind the wheel of a Midget was the drive to the MoT test station. This was a double success, the car passed, receiving nice compliments from the tester, and Tim discovered he enjoyed the car’s very direct, responsive handling.
Inadequate A-Series: an idea is born
For many years, Tim and his wife enjoyed driving their little MG on B-roads and country lanes, with Tim taking on a few hill climbs, including a hill climb school at Prescott. He came away from the experience feeling he had a great car for such sporting antics, but it was fitted with the wrong engine. As he puts it: “after a bit of over-exuberance at Prescott, the A-Series engine was suffering. I was worried about it going to pop at an event”.
After happy hours spent online in various chat groups as far afield as the Antipodes, the answer was obvious. The Midget needed another Rover Group engine as fitted to later MGs, in the shape of the K-Series. With alloy block, five bearing crank and double overhead camshafts, this power unit is bigger and stronger than the A-Series, and could offer power and reliability without significantly affecting weight distribution.
Tim is very particular about the standards of his work, so before embarking on converting his Midget, he spent time online gathering information, and to keep costs down he trawled the internet for parts. Clearly the Midget’s gearbox wouldn’t cope and lacked first gear synchro, so the specification became MG 1.8 K-Series engine, driving through a Ford Type 9 ‘box, giving the Midget a fifth ratio suitable for cruising. The tall fifth gear also meant the original back axle and final drive ratio could remain, one less expense to consider.
He found an MG TF engine in good condition and wisely opted to have a modern head gasket fitted. The engine is the 160bhp version with fixed valve timing; the more powerful variable valve timing engines need an unsightly hump in the bonnet to clear the VVT mechanism. He separately found a Type 9 gearbox and a suitable bellhousing to mate it to the K-Series. The key elements for the Midget’s transformation were in place.
Fitting an engine and gearbox
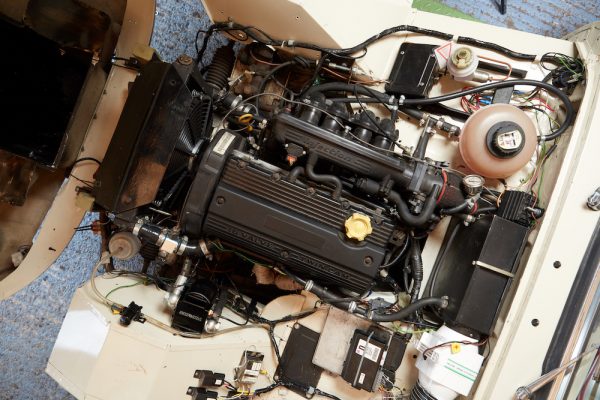
In 2018, Tim set about his well-planned conversion. He explained “the biggest jump was taking apart much of what I’d achieved during the first restoration”. After starting by pulling out the original engine and box, the toughest part was cutting away metal he’d previously repaired, to achieve clearance between the new engine and the bulkhead and transmission tunnel. There was plenty more welding to be done as Tim reshaped the bulkhead around the heater, requiring some application of the home restorer’s favourite CAD tool, Cardboard Aided Design! The battery was rehomed in the boot.
The custom engine mounts were crafted from steel flooring joist supports, with more welding involved. Because of the extra welding required, Tim justified buying a better MIG set, which quickly became his favourite tool. The engine mounts required much planning and measuring; internet wisdom advised the engine would have to be trial fitted four or five times, with repeated adjustments, to arrive at the correct location.
A new crossmember was required beneath the Ford gearbox. After removing the old one, Tim opted for the simplest route of buying an off-the-shelf crossmember which bolted straight up. A hole was cut a few inches further back in the tunnel to accommodate the Ford’s gear change, and Tim has neatly repurposed the original gear lever surround to hold a smartphone for satnav use.
On the road again
After 18 months completing the MG TF engine conversion, Tim’s Midget was back on the road again. Asked about his first impressions, he recalls: “it was frightening with so much power on standard Midget suspension”. He has sharpened up the handling dramatically by improving axle location with a Panhard rod and fitting a thicker anti-roll bar at the front. But the biggest handling improvement came from new tyres, a set of Uniroyal RainMasters. He now describes the handling as ‘very predictable’.
What it’s like to drive
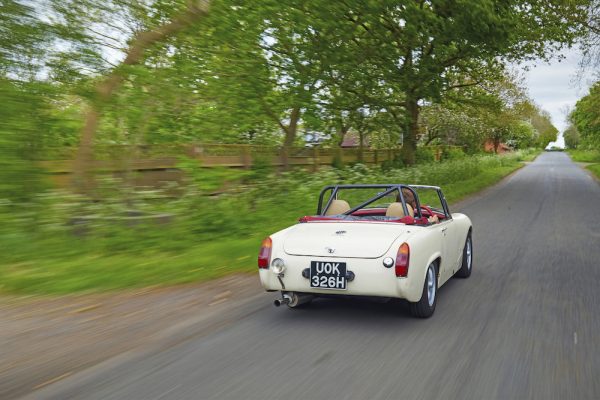
First, master the technique for entering a Spridget – feet first. Once seated, this car is almost like any other Midget, cosy and with the benefit of all four corners being easily visible. Triumph’s rival Spitfire is spacious by comparison. The stubby lever for the Ford Type 9 ‘box is a few inches back from the original position but falls nicely to hand.
Turn the ignition key and there’s a brief buzz from the fuel pumps, then the starter produces instant fire up from the EFi fuelled motor. The exhaust burbles a little at tickover and pulling away, we’re quickly through the low first gear and into second. Clutch and gear change action feel precise, so changing gear is accomplished smoothly. This Midget accelerates briskly with a purposeful four pot bark from the tailpipe. Steering is direct in typical Spridget fashion, suspension is firm though not harsh, and the standard brakes do well enough arresting the lightweight car.
The impression is of an engine that belongs in this car, a soundly engineered conversion in the manner Ken Costello fitted V8 engines to MGBs. This K-Series transplant is a credit to Tim’s vision and skills, with all the fun of a standard Midget but much, much faster!
Read the full version of how Tim managed to transform his MG Midget K-Series on the Practical Classics page.
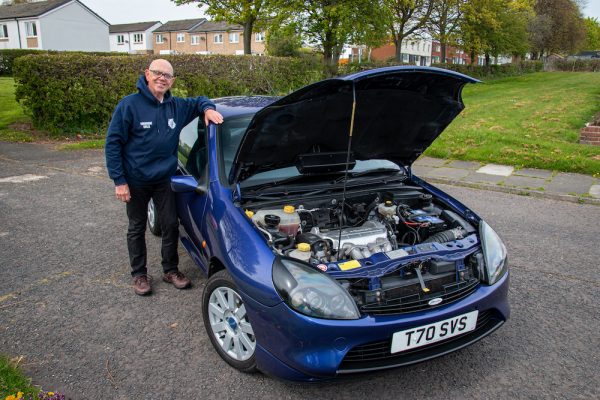
Stuart Shackleton and his perfect Ford Puma
Words and Pictures by Theo Ford-Sagers
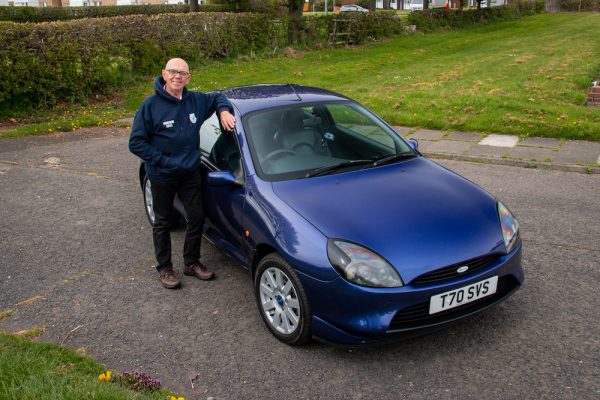
When rust condemned Stewart Shackleton’s Ford Puma, it became the start of something special. He explains:
“My daughter bought this car about 15 years ago, and after running it for a few years she asked if I wanted it. The answer was yes, and it became my commuting car until 2017. That’s when it failed an MOT with a long list of issues. So… what to do?
“I’d already bought a donor car, and stripping that down gave me some experience of what was to come. Ironically it turned out to be in better condition than the one I was restoring! Fortunately, I’ve got a lock-up and a shed, and a summerhouse that was purloined for storage.
“The project car’s sills were rotten, so I took it to a local body shop guy to fix the passenger side. Lovely fella, but when I got the car back the profile wasn’t quite right, so I cut it out and did it myself. My good mate Martin lent me his welder and showed me the ropes – I’d never welded before so that was a real learning experience.
“Martin told me, ‘if you’re going to repair it yourself then do it properly,’ and he was right. I made that sill three times before I was happy with it! The other side needed replacing too, though it wasn’t quite so bad, and by this time I’d learned some lessons. It’s thin metal – only about a millimetre – so you need a very light touch. Welding isn’t hard, but you’ve got to be patient as it does take time to get the hang of it.”
Getting creative
“The floor was also rotten, so I had to make new sections, then it was all seam-sealed and painted. There was a bit of rust at the bottom of the front inner wings I had to repair, and a lot of new metal was needed around the bottom of the rear wings. It turns out part of the front wing on a Peugeot 205 is an exact match for the rear wheel arch on a Puma!
“I had the wheels, subframes, wishbones and hub carriers professionally powder-coated, and fitted new shocks and new OEM suspension bushes all round. Poly bushes are too hard in my opinion. It all went back together with new brake lines, callipers, pads and rear shoes, and I painted the fuel pipes different colours to help keep track of which is the return, and which is the supply.
“Then once it was all together, I filled the repaired areas, flatted it all smooth and sent it off to the paint shop. It came back looking smashing, but I still had to fit a rubber strip that goes under the front bumper. I lifted the front with my hydraulic ramps, fitted the strip, then went to reverse the car out of the garage… but forgot to lower the ramps. Outcome: one knackered front bumper! As you can imagine I had to shut the garage door and leave it alone for a few days while I cooled off.
“But finally, it all came together, and a local mechanic gave it a once-over and put it through its MoT. Now the Puma comes out of the garage a few times a month, and I’ve got 10 car shows lined up for it this year. It brings out the boy racer in me sometimes!
“I’ve kept a meticulous log of everything to do with the car, recording what was done and the day I did it. What did it cost? Don’t ask. The car is staying with me and going back to my daughter and grandson when I peg it!”
Read the full version of how Stuart managed to transform his Ford Puma on the Practical Classics page.
Practical Classics: Perfect reading for classic car and restoration enthusiasts
The Restorer of the Year competition is one you certainly won’t want to miss. Each magazine edition features two unique stories on how classic car owners have managed to restore beautiful classics they have found to working order. The winner will be chosen by the readers and will be revealed at the NEC’s Classic Car & Restoration Show in March 2023.

